Thursday, March 31, 2011

When Good Enough will do

I was at the local farm store a few days ago & did some window-shopping while waiting for my grain order.  Ooooo, saw a nice shiny grain scoop.  Picked it up & then put it down as soon as I saw the price; $14.95.  Don’t get me wrong, it was a nice looking galvanized scoop with a large capacity, rolled rim edges & handle.  I guess I’m just too cheap. 

Here’s our grain scoop:
And I have about six million of them. 
I also like to keep these two “dollar items” right by each water bucket for ease of access: 
Is it a top-quality brush?  Of course not - it only cost a buck.  But I get my dollar’s worth out of it and I can toss them before they get too “icky” or beyond the point of being able to clean them off.  Yep, you just saw a part of my rampant consumerism in action.   
I have to keep brushes and scoops up & away from the goats or they will take them and hide them on me.  Keeping the scrub brush right by the water bucket also gives me a visual reminder to scrub them out.  Now I can scrub it out every other day without searching for the brush or going into the barn or house for one (and either getting distracted or entirely forgetting about it).
The kitty litter scoop is for skimming ice out of the buckets in the winter.  I use the one in the mule barn all year; scooping ice in the winter & straw / hay all through the year.
And here’s our fancy water transporter:
Empty Kitty-Litter container
Since we don’t have water to the barn or the garden I’ve been using these to haul water.  Not too heavy and I can easily carry two of them with the handy-dandy handles.
We also use empty popcorn tins for mouse-proof storage of goat mineral and chicken grit.  If you haven’t been the recipient of a tin of popcorn this past holiday season I’m sure that you can find one from a friend or at your local thrift store.
I was just gifted a box of home-improvement magazines by a friend of mine.  I love looking through them for decorating ideas.  While flipping through the pages today, I saw an ad for an under-the-counter composting bin (this was the inspiration for tonight’s post).  It was a stainless steel bucket about 8” across with a matching lid.  Was it cool?  Sure was.  Was I going to spend $300 for a metal bucket and lid?  Come on……three hundred dollars??  Heak no.  And even if I wanted a composting bin like that, it could be done much cheaper.  Besides, we have this one:

And guess what?  It’s good enough.  Actually, it's great.  It has a tight-fitting lid, an indention in the pail for easy grabbing and washes up nicely.
Hillbilly-esque?  Yup.  But cheap – or free – and environmentally saavy is better than “good enough” in my book.

Wednesday, March 30, 2011

Free Advertising

If any of my fellow blogging-addicts have a home based, family owned or small business that you'd like me to post on my sidebar, I'd like to add you.  Only a few "rules" though as I don't want to turn this into an advertising nightmare:

As I mentioned, your business must be a small business, either home based or family owned.  The products you offer must have something to do with homesteading as I would like the listed businesses to "gel" with my blog.  Well, technically Louisa's & Millie's Chocolates don't really have much to do with homesteading except the fact that without a semi-regular suppply of them, I'd be a really, really crabby homesteader.

I'd also appreciate it if you "Follow" me here at Krazo Acres.  Gives my under-inflated ego a bit of a boost.  Sad, I know.  This way I can also check out your blog!  I'm a blog addict.

Of course, I'll have final say to which businesses I list.  Please don't take it personally if I don't post yours.  Let's say you make sweaters for armadillos.  Right now I'm at war with the little buggers so I'm probably not going to want to be reminded of them every time I open my blog. 

Picky?  You bet.  But it's my blog and I can do what I want.

Besides, what do you expect for free advertising on an obscure, no-name blog centered around animal excrement, parasites and weeds?

Tuesday, March 29, 2011

Eating the Weeds - Onions

Back in the ‘burbs, we seemed to have every type of edible weed in our yard; Dandelions and Chickory, Mallow and Purselane, Plantain and Shepard’s Purse. But being close to a busy street and having neighbors that doused their lawns in pesticides and herbicides, I never really felt comfortable eating them.  Of course, now that we’re out in the country, my lawn is anemic in the Dandelion department and totally deficient in any Chickory, Mallow or Purselane.  But there is one weed we have here that our suburban yard was missing:
Onions!
I was tickled pink to find that our front yard contained wild onions.  So not only do I get to walk out my front door and dig out a handful of miniature onions, but as an added bonus, it smells like a salad bar when we mow the lawn!
And to think that people spend money on chemicals to eliminate those little bulbs of flavor growing in their lawn, then turn around and pay for their cousins in the supermarket.
What dish couldn’t use an onion or two thrown in?  I use the onion bulb cut up and the green tops chopped like chives.  I put them in just about any dish that calls for an onion (except for those specifically calling for sweet onions) and will readily toss them in a dish that didn’t explicitly call for one.  With the exception of things like Jello or ice cream, what recipe couldn’t use a bit of onion flavoring?
I have to admit that I may go a bit overboard at times; onions in the scrambled eggs and the fried potatoes for breakfast.....

In the egg salad sandwich for lunch (eaten on onion & dill bread, of course).  Then for supper it’s tossed into the salad, garnishes the soup, mixed into the rice pilaf and rubbed into the baked chicken.
Anybody got a mint?

Monday, March 28, 2011

Fenceposts & Fungi!

If I have any hopes of ever getting to harvest a single blueberry or strawberry in the near future, the berry garden has to be fenced.  The chickens just love scratching around the mulch in there and the baby goats (who can escape out of the goat yard through the cattle panels) are eventually going to find out that they can eat those bushes.  And I’m sure the deer wouldn’t mind a night-late snack of them.
So while Rhiannon and I were inside doing household drudgery this weekend, Paul was working on my garden fence.  Isn’t he great?!

While sawing up cedar logs for posts, Paul found a funky looking mushroom on one of them.  I think it’s a Black Rubber Cup (fitting name), but of course, I’m not totally sure.  The description fits, but the field guide says they are found in the Pacific Northwest.  I wish there was someone around here with real field experience on local mushrooms.  

Two years ago there was a huge batch of mushrooms on the stumps of sawed off trees, close to the ground.  At first I thought (and hoped) that they were Chanterelle mushrooms, but then found another one, the Jack O’ Lantern that looked very similar.  And of course, the Jack O’ Lanterns are poisonous.  The field guide said that if gathered fresh and taken into a dark room, the gills will give off an eerie green glow.  Next time I see these I’m going to pick some and see if they glow in the dark.


Every once in a while we’ll get puffball mushrooms in the front yard, although I haven’t tried eating those yet.  I think that will be the first wild mushroom I try as they are darned easy to positively identify.  Morel season is also just around the corner and I’m going to try to do some serious hunting around the property for those.
I really need to learn to ID these things.  We just love cooking with them, but I just can’t stand spending $4 a pound on those tasteless, button mushrooms in the stores.  I can also get Portabella mushrooms in the store, but they are even more expensive and they are definitely lacking in quality.  
Paul has mentioned buying a mushroom kit before, but I don’t know if I’m up to another gardening project right now.  Besides, I still want “free” wild edibles if I can find them.

Friday, March 25, 2011

Spring Tease

While putting all the critters to bed last night, I happened to hear one of the harbingers of spring; a Whip-or-will!  Spring and warm weather must really be here!  The daffodil and hyacinth flowers are blooming, tulips are about to pop, redbud and dogwood and wild plum trees are flowered out. 
And then I proceeded inside the house to light a fire in the woodstove.  And was woken up in the wee-hours of the morning by the sound of a thunderstorm with hail.  And had to sweep a sheet of hail off the goat porch in the morning….in my winter jacket.  The storm had also taken off most of the blooms on the forsythia bushes.
Last night was the coldest we’ve had since the goat kids were born; not below freezing, but still cold and damp.  When I opened the kid stall they were all snuggled up together in a pile of hay in the corner of the barn.  This is the earliest in the year we’ve had goat kids.  Normally I try for kiddings in the first few weeks of April in order to avoid the cold weather, but this year I had to start a little early.  I wanted everyone to have access to the kidding pen with their new babies for at least two weeks before I kicked them out to make room for the next expectant mother.  Annette is due in ten more days so Nettie & her kids have another week in there before I kick them out in order to put down new bedding and get everything ready for another kidding.
Since it was cooler out, I figured it was a great day to make something warm and sweet to snack on….Banana Oatmeal Muffins!

Actually, I probably would have made them regardless of the weather since the bananas were getting to the “just a tad too ripe” stage and I didn’t want them to go to the chickens.
Anyone have any idea why my muffins have a flat top?  They were cooked all the way through and I didn’t open the oven door or anything.  I think this also happened the last time I made them.   Maybe something with the recipe?  I never noticed it when I made it into a loaf, so maybe the recipe isn’t fit for muffin-making.
Here’s the recipe:
1 ¼ Cups Whole Wheat Flour, 1 Cup Oatmeal, 1 tsp. Baking Soda, ½ tsp. EACH Cinnamon & Salt, 1 Cup Sugar, 2 Eggs, ½ Cup Veggie Oil, 1 tsp. Vanilla, 2 Ripe Bananas, ¾ Cup Sunflower Seeds (or other nuts….or no nuts)
I never used to put sunflower seeds in my banana bread until one day I started the recipe and noticed I didn’t have any walnuts or pecans on hand.  I did, however, have lots of sunflower seeds.  So I figured what the heak & I loved them in there.  Now they are my nut/seed of choice for banana bread.  And as a bonus, they are cheaper than walnuts or pecans!

Thursday, March 24, 2011

Pounding Rock

Paul did more tractor and dozer work last weekend in order to increase the size of the goat yard.  The goats have been in an area about 45’ x 45’ and it just wasn’t large enough for them; especially since the herd size went up by three (Nettie’s new doelings) and we still have three more pregnant goats so more are on the way!
After we cleared the area for the goat yard addition, Paul set up our new mechanical post pounder and pounded away.  The ground was still a bit damp, which makes pounding posts - by hand or mechanically - much easier. 
People-Powered Post Pounder

Paul had debated on which type of mechanical post pounder to get for several months.  Why get a mechanical post pounder when there is such a thing as a “manual” post pounder you say?  Look back at the above picture.  That pounder isn’t sitting on a gravel driveway….that’s some of the cleared land.  And that’s what the posts have to go through.  Yes, there may be an inch or two of top “soil” where grass can get a foothold, but just underneath the surface is rock.  Anyone who lives in the Ozarks knows that the three things we grow best around here are ticks, chiggers and rocks.
He looked into an attachment for the tractor, but that meant that we’d have to clear a path for the tractor even before we could put in posts and about half of the area we want fenced is in the woods.  As much as we’d like to have a clear trail surrounding the property, it’s just not feasible at this time; too time consuming.  Although the tractor attachments were nice, they were also quite spendy.
The post pounder he ended up buying is a unit made by Rohrer Manufacturing out of Oregon.

The unit is pneumatically operated so you also need an air compressor to run it. 

We found a used compressor in our local paper and it is large enough to run the pounder, but still small enough that it isn’t too much trouble to move it around on the property.  The compressor is also handy to have around for other air tools and for pumping up the tractor tire on site instead of having to drive the tractor back to the garage.
We ended up setting about fifteen t-posts and used some of the trees as supports.  We still had a stack of cattle panels so we tied those up to the posts and trees instead of using a field fence.  This isn’t an ideal setup, but it more than doubled the goat area. 

After we finish clearing a bit more land for pasture, the idea is to put up treated wood posts every 100’, t-posts between those and use a “goat proof” (Ha!) field fencing with a hot wire at goat-nose and mule-nose height.  I like the durability of the cattle panels, but it would cost way too much to fence the larger area with them.  Ms. Melman and Nugget (the mini-horse) will then finally join us here and they will share the pasture with the goats & chickens.
I sure hope everyone gets along.
Paul's Take
Carolyn wanted a place with all woods.  Didn’t consider that having livestock would require some sort of pasture.  But did she listen to me??? Nooooooooo.  So now I’ve got to run a tractor and a dozer and a chainsaw, saw logs and split wood and burn brush.  Buy t-posts, field fence, hot wire, fence charger, connectors, insulators, fence pliers and a million other things.
The pneumatic pounder works fine, although I would like to have a hydraulic post pounder for the back of the tractor; more power, less work for me.   Actually, I’d like it if we had bought a place with pasture instead of woods in the first place, but noooooooooooo.
Not only that, but I never recall agreeing to an entire herd of goats.  I believe she said she wanted a milk goat.  Not three, not seven, not a dozen.  We wouldn’t need all this fencing if we didn’t have all these animals.  Now that I think about it, I believe I only agreed to the chickens. 
She’s trying to kill me.

Wednesday, March 23, 2011

Eating the Weeds - Dandelions

Spring officially started this weekend, but for us, it starts with dandelions.  You know, those pesky yellow weeds that contaminate manicured lawns and the bane of suburban gardeners.  How many millions, if not billions, of dollars are spent on chemicals just to eradicate a little yellow flower?  Pretty wacky way to spend your hard-earned paycheck if you asked me.
I remember picking dandelions in the school yard, popping the heads off or making little wreaths out of them.  And of course, who hasn’t taken a fuzzy-headed dandelion and blown a wish to the wind?
Rhiannon and I picked just about every dandelion in the yard.  Sadly, there weren’t that many.  It seems that when we lived in the suburbs, our lawn was covered in the flowers - we didn’t spray and it drove the neighbor nuts because they had the “picture perfect” lawn.  Now that we live out in the country we can eat the flowers without worrying about vehicle exhaust and neighbor’s herbicides / pesticides.  So now that I want those weeds in the yard, they don’t want to grow here.  Go figure. 
I took our meager harvest of dandelions and did what any other person would have done; battered and fried them!  Last year I actually made individual flower fritters, but I was too lazy and just plopped them all in the batter & spooned out small clumps into the hot oil. 
The dandelions didn’t use up all of the batter and goodness knows I didn't want to waste it, so I cut up an apple and made apple fritters. 
Fritter Batter: 1 egg, 1 c. flour, 1 c. milk or water, pinch salt, 2 Tbsp. sugar (or more)

I’ve been given permission by the neighbor to pilfer their property of weeds so we’ll have to go up there this week and do some picking.  I’d like to try my hand at making some dandelion jelly if we get enough.
Christine’s Silkies also started laying a few days ago. 
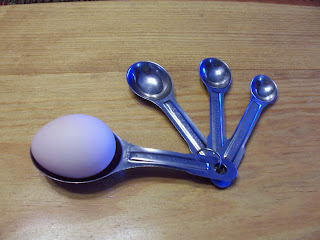
I haven’t decided if I’m going to let them set or not.  I was hoping to have them hatch a few of the larger chicken eggs, but the Silkies are so tiny that I don’t think more than three normal sized eggs would fit under her.

Tuesday, March 22, 2011

Parasites, Part 1

No, I’m not talking about the members of Congress, but the microscopic blood and nutrient-sucking nasties that tend to hang around barnyards.
I’ve recently been given a much needed wake-up call regarding parasites in our goat herd.  Nettie has been losing weight.  Naive as I am, I had just attributed her weight loss to her outstanding milk output the past several years and her recent birth of triplets.  She hasn’t been off her feed, acting lethargic or abnormal so I really didn’t take much note of her overall condition with the exception of some weight loss.  I give the goats a pelleted wormer three times a year and occasionally dust them and the chickens with D.E. (I use an empty single-serving yogurt container with small holes punched in the lid, works great).  They also have a salt lick and a mineral block labeled for goats.
But I became complacent.  They have food, water, shelter.  I worm them, they have minerals, I trim their hooves……done.  But I should have seen the writing on the barn. 
Before the ice storm took out the electric fence two years ago, our herd of four had roughly an acre of woods to roam around in.  Since then, our herd of seven has been living in two different “temporary” areas.  One year they were in the back yard and this past year they were back at their barn, albeit in a much smaller area that measures roughly 45’ x 45’.  They seem to be comfortable and nobody is stepping on each other for space, but it definitely isn’t roomy enough to run around like crazy goats and it gets grazed down in the winter to nothing but dead grass.  But the most important thing I was overlooking was the fact that there were seven goats pooping in that area for over a year.  And poop = parasites.
Last week I did something so simple, but something I had forgotten about, and it made my heart drop.  I simply pulled Nettie’s lower eyelid down & looked at the color.  And it was a pale pink. 
There is a very simple and un-invasive test that involves doing just what I had done, using a color chart called the FAMACHA eye chart.  It was developed in Africa as a cheap, easy and pretty accurate way of judging if a goat (or sheep) was anemic.  Basically, the area underneath the eyelid is a perfect place to judge just how much iron is in your animal’s blood.  Lack of iron is usually caused by blood loss.  And unless you’re goat is bleeding externally, chances are that Haemonchus Contortus, or more commonly known as the barber pole worm, is sucking the blood from your animal from the inside.  And if there are enough of those nasties snacking on your goat’s lifeblood, it will cause her to become anemic.  Which is bad.
Severe anemia will ultimately cause death in goats if not treated, and the barber pole worm is a huge culprit in the deaths of goats and sheep. 
So why don’t you just worm them all the time to keep the worm population in check?  There are several reasons.  One of them is that a wormer is a poison; basically you’re just giving the goat enough poison to kill the worms, but not the goat itself.  Another reason I don’t like to constantly give wormers is that we drink the milk from the does and eat the meat from the males. 
There is also the very-real possibility that you can (and will) cause the parasites to develop immunity or resistance to the wormer.  This is the reason you are supposed to rotate several different types of wormer.   Apparently Ivermectin has been rendered almost useless in several areas of the US because of overmedicating. 
Anyways….back to Nettie.  She was given (along with the rest of the herd) a medicated goat pellet called Positive Pellet Goat Dewormer.  This is the only wormer I’ve given my goats & they get it in the spring, summer and fall.  This type of wormer is supposed to treat infestations of the barber pole worm among others.  But after having my heart-dropping moment at diagnosing her anemic condition, I did some much needed online & book re-education in worming livestock.
Pregnancy and the actual act of giving birth takes a toll on a goat and the parasites can get out of control because the goat’s immune system has been weakened.  So I decided to give her an additional dose of Ivomec (Ivermectin).  This wormer is labeled for use in cattle and swine as an injection, but you administer it orally to goats.  Recommended dosage is 1 mL per 50 pounds of weight, but you can give as much as 1 mL for every 34 pounds of weight.  Nettie weighs approximately 140 lbs. so I gave her just a tad over 4 mL.  Since the medication is bottled for injections, I had to take a needle and syringe to remove the wormer from the bottle and then squirt it into the drenching gun (remember to safely dispose of the needle!!).  I put Nettie in the milk stand and she was thinking that an extra meal was coming her way, but I surprised her with the drenching gun and it was down her throat before she could struggle much.
I also bought a bottle of Vitamin B Complex and a bottle of Red Cell to help get her Iron levels back to normal.  She’ll be getting drenched with 8 mL of the Red Cell once a day for at least a week and a 7 mL intramuscular injection of Vitamin B Complex once a day for at least a week.
I’m also going to try something I read on the net; it’s a concoction of corn oil, Kayro Syrup and Molasses given orally or mixed with grain several times a day for a week. 
I’ve checked eyelids on everyone else and no one was as bad as Nettie was, but definitely not in top condition.  I’m going to do a bit more research and then worm them all again in a few weeks with a different family of wormer.  And in the meantime I’ll probably give everyone molasses in their feed for a little iron boost….won’t hurt. 
So what are we going to do to prevent this from happening again?  We’ve already more than doubled their goat yard just this past weekend by putting up more cattle panels & t-posts.  It’s still nowhere near as large of an area as we’d like, but it’s a start.  I’m also going to have to stop throwing the chicken scratch in the goat pen.  The chicken feed is on the outside of the goat pen (because the goats just love chicken food), but every morning I was tossing out a scoop of scratch by the goat barn so the chickens would peck around & hopefully eat the ticks & other bugs around the barn.  The only problem with doing that is the goats also liked picking through the left-overs and in the process were probably ingesting more worm eggs. If I were to drop a carrot on the ground, the goats wouldn’t touch it with a ten foot pole, but if there’s a speck of chicken scratch on the ground, they have no problem licking it up.  Go figure.
I’ll also be worming on a more regular basis now, and possibly year round.  Our winters aren’t that harsh so I’m sure the parasites will take any opportunity – like a few 50 degree days in a row mid-winter – to get an early start.  I’ve also called our vet and asked her if she’d do a fecal exam on the goats in the next few weeks.  I suppose I should have really had one done before the worming in order to see if the medications were actually working.  But at least this way I can see if anyone is still having problems after the worming.
Getting to this point didn’t happen overnight, and I’m sure it’s going to take months to get Nettie and the rest of the herd back on top.  Another lesson learned, and hopefully not soon forgotten.   

Sunday, March 20, 2011

Goat D-Day

If you’re a keeper of goats, you can probably guess what the “D” stands for (no, not the ultimate D, but the other D). 

Disbudding box, clippers and dehorner (i.e. disbudding iron).

Today was disbudding day for Nettie’s triplets.  This is my second least favorite park of keeping goats. 
Most goats are horned, although some are naturally polled - meaning hornless.  Unless you raise meat goats (which normally keep their horns), or morally object to the disbudding, you will probably have your goats disbudded.   I’ve heard the pros, I’ve heard the cons, but in our experience we feel it is best for the goats (and us) that they be disbudded.  Technically, horns can be removed after they have grown in, but it requires a vet visit, the goat to be put under and basically sawing off part of their skull.  No fun there.
Before we got goats I had read several books and done my fair share of online research, but were still unsure if we were going to let our goats keep their horns or not.  Personally, I really liked the look of a goat with horns.  When we got our first goats, Nettie & Chop Suey, they were both already disbudded, so we didn’t have to really worry about it until Nettie kidded.  Before she was due, we decided to buy a disbudding iron so we could keep un-horned goats.
Since our first disbudding experience five years ago, we’ve disbudded eleven goats with no problems.  Although we’re not as nervous as we were the first time we did it, it never really gets any “easier”.  It’s not a nice thing to do.  And the smell of burnt goat hair seems to stay in your nostrils for the rest of the day.
Two years ago we kept three wethers for butchering later on.  For whatever reason, we didn’t get around to disbudding one of them.  He was constantly getting his horns stuck in the fence and I’d have to pull his head out a half-dozen times a day.  You’d think he would have learned.  Well, I learned.   No more goats with horns – even if they are going to end up in the freezer. Also, if you are going to show your dairy goats, they will have to be polled.
We disbud our kids anywhere from 3 days to one week after birth.  Shortly after birth (or right after for some male kids) you’ll feel a hard pimple-like bump on the top of their heads; that’s the beginning of the horn.  You want to destroy the horn bud underneath before it starts to grow horn.
I’m sorry I didn’t get pictures of the actual procedure, but it takes two of us to do it and I didn’t want to screw it up just to post a picture.  If you want to see some pictures of the disbudding process, let me know and I’ll list a link or two with information on it.
Anyhow, the kids get a quick haircut around the horn buds.  This allows us to clearly see the area that needs to be burned and it also prevents a lot of smoke from the burning hair.  Then they get plopped into the box with their head sticking out and I’ll straddle the box & hold their head securely while Paul does the actual disbudding.  The tip of the iron is round, but you don’t just press it on the skull, you have to kind of “roll” it around on its edge.  I’ll slowly count to ten out loud while Paul holds the iron to the kid’s head.  He’ll remove the iron & I’ll blow on the skull to cool it down a bit.  The skin underneath will turn a copper color and look like an “O”.  Then he’ll take the tip and burn the little nub at the center of the ring.  Same thing for the other horn bud.  Obviously, this is a painful procedure and there is loud goat-screaming, but after the nerves are burned the kid will sometimes stop yelling.…which is kind’a weird. 
Actually, there is much yelling even before we start the actual disbudding.  They yell when we take them out of the goat yard – Oh my gawd, where are we going and where is Mom???  They yell when we shave their head – Oh my gawd, what is that buzzing and where is Mom???  They yell when we put them in the box – Oh my gawd, what is this thing and where is Mom???
But when it’s all over and I take them back to the goat yard, they jump right to their mom, have a comforting snack & bounce around like nothing has happened. I’m in no way insinuating that they feel no pain, but I think that they recover very quickly.


Looking out at our little hornless herd, I am glad that we’ve decided to go this route and feel that it is worth the extra effort on our part and worth the twenty seconds of pain on their part (easy for me to say, I know).

Friday, March 18, 2011

Short Blogging Hiatus

I’ve been neglecting my computer lately.  And it's amazing how much more stuff I get accomplished!  But don't worry my dearest blog addicts, I still need my blogging writing-reading time.  It's cheaper than going to a shrink!

The weather earlier in the week was cold, so since the woodstove was fired up I was able to use it to cook a pork roast and some soup.  The soup recipe is one from Yukon Mike’s Living Prepared blog.  He has several recipes on his site that utilize only dry storage foods.  I had to make some slight modifications to his recipe though as I didn’t have any dry tomato powder or dehydrated carrot.  I normally don’t make tomato-based soups as Paul doesn’t care for them, but I went ahead and made it anyhow. It was a very hearty soup, almost a stew, so I actually added another cup of chicken broth to it.  All in all, a very tasty, very filling soup.

The stove was only lit for that one day as the rest of the week has been sunny and warm.  Beautiful weather for doing outdoor chores and for spending some time with the goats.  I didn’t spend much time with the goat kids last year, so Cloud is still quite skittish around me.  And since she is going to be kidding in two months, I’ve really got to get her warmed up to me.  Not just for helping her with her first kidding, but I’m also going to be milking her and milking a goat that doesn’t want to be milked is definitely not a fun chore.  We’ve made some progress in the past few days.  I still can’t go right up & catch her, but if I sit down she will eventually come by me & let me scratch her head.  Raisins are my bribe of choice.
Nettie finally took her kids outside of the pen yesterday.  They ran around like crazy-bouncing-goat-babies, eventually exhausted themselves and found a box to do some power napping in.


I don’t think I’ll ever get tired of watching goat kids running around and playing.  Between them & chicken-watching, who needs a television?? 
I swore I wasn’t going to plant anything this year that we couldn’t eat, but I ended up starting yet another inedible project outside. The wellhead in the front yard had some badly neglected and clumped Day Lilies around it and needed a makeover.  Mom brought me some extra Canna and Iris bulbs so I figured that would be a great spot for them.  So I dug out the grass around it, dug a perimeter trench and made a rock border. 

I had to dig up some of the Day Lily bulbs to make room for the other bulbs so now I have to find another place for them (and another project).  Or maybe I’ll put an ad in the freebie paper and see if someone will swap for some other type of bulb or maybe even some veggie starts....but that means more digging.  Ah, the digging never ends.

Monday, March 14, 2011

What else Ya got up in there?

Nettie started in labor around 9 am.  She was being quite vocal, wandering around with that “dazed” look in her eyes and doing the archy-back thing.  So I let her walk around and stretch out in the goat yard for about fifteen minutes and put her back in the kidding pen so I could get my barn clothes on.  She didn’t start hard labor for another hour.  Grandma came over to watch Rhiannon so Paul could help me & take pictures.  Because I know you all want to see the birth of a baby goat.  Well, maybe not all of you, but if even one of you get to see or learn something new, then it’s worth it.
So here’s your final warning.  If you’re not into seeing goat bums up close, stretched nether regions and bloody placenta, come back tomorrow when I’ll just post the fluffy-cute-bouncy pictures of the goat babies.
Here’s Nettie starting to arch her back from early contractions.  Her back will slope down more and her tail will be held high.  She’s also lost her “plug” and the goo is hanging off her backend.
Contractions coming on harder now.  She laid down & she’s pushing in earnest.


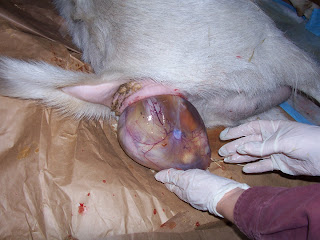
Here’s the “bubble”; the embryonic sac where the kid is.  This bubble got sucked back in once or twice between contractions.  You can kind of see the hoof in the mid/lower left side of the bubble – it’s a white smudge in the picture.  What you're hoping to see are two front hooves and a nose; meaning that the kid is positioned correctly.


Kid number One.  The yellow / brown goo is meconium (first poop), sometimes the kids come out with it, sometimes they don’t.  I made sure to give the kid a good first cleaning to get rid of the meconium and clean out the nose & mouth before any could get in there.


At this point I was ready to call it quits.  Nettie wasn’t big at all this year & I figured it was because she was only having one kid.  But just a few minutes later she started with contractions again.  I was hoping it was just the placenta, but it was another bubble!

And a good shot of the bubble with the head in the left of the bubble and the two hooves on the right.  Another correctly presented kid!
So I worked on cleaning & drying off the first kid while Paul started on the second kid.  Nettie was going back & forth from kid to kid, nuzzling & washing them, making Momma Goat sounds to them.  After only a few minutes, Nettie laid down and started grunting again!  How many kids did she have up there???
We didn’t get pictures of the third kid as we were still messing around with the other two.  Paul was closest so he would help this one.  At one point I looked over & said that something didn’t look right.  I saw hooves, but they looked funny; they were the back hooves!  This kid was being born breech.  But before I could even get excited or scared, the kid slid right out and Paul handed it to me for cleaning.
We dipped & tied all three cords, towel dried and fluffed each one up and made sure everyone was in a nursing mood. 


At one point Nettie made a grunting noise and I was afraid it was another kid, but it was the placenta.....finally!
What a morning.  Oh.  And they are all does! 
So Mom & the triplets are all in the barn and I’m sitting at the computer listening to the squeaky goat kid voices and sucking noises as they root around for breakfast.
Great job Nettie!

Sunday, March 13, 2011

Snooze the Rooster, will ya?

Had a false-alarm with Nettie.  Put her in the kidding pen last night & around 10 o’clock I swear it sounded like she was grunting from labor pains.  Of course, Rhiannon and I were just finishing up with our bath so I yanked her from her bubble bath, dried her & put her in her PJ’s, gave her to Paul, then pulled on my barn clothes & ran outside to the barn.  I sat with Nettie for over a half hour and not one grunt, groan, arch of the back or apparent contraction happened.  So back into the house I went, got out of my barn clothes and went back to getting Rhiannon ready for bed.

Of course, the rest of the night I only half-slept because I was listening to the goat monitor for any more signs of impending labor.  There was a lot of pawing and heavy breathing, but no grunting from contractions.  It seems the moment I did fall soundly asleep, the rooster started crowing.  You can only imagine how loud a rooster crow can sound over a baby monitor if it can pick up something as soft as a goat breathing.  It was quarter to five.  (Actually it was quarter to six….stupid time change.)  I tried to ignore it the first ten or fifteen times, but eventually had to hit “Snooze” on my rooster-alarm-clock….I turned the monitor off.  Figured Nettie wasn’t making any noise & I’d be up in a short while anyhow to feed everyone & let the chickens out.
Nettie didn’t look any closer to kidding than she did last night.  She wasn’t dilated, wasn’t grunting, and her bag still isn’t anything close to what it looked like last year just before she kidded.  Her belly isn’t as large as last year either.  Maybe it was because she had twins the past two years….and maybe if I’m lucky, she’ll only have one kid this year. 
I let her out of the pen for breakfast (which she didn’t finish) and to roam around the goat yard for a while.  She’s definitely a bit cranky this morning and the fact that she didn’t eat all her grain makes me think that we’re getting close.  I gave her a few hours out of the kidding pen but when I found her underneath the barn again I called her up & put her back in the pen.  So the wait continues.

Saturday, March 12, 2011

Depressing.....or Possibilities?

I cleaned out the berry garden about a week ago and in the process, made myself a vacant garden bed, ready to be planted.  Normally that would be something I’d be happy about, but the reason it is now vacant is because every raspberry & blackberry bush I had planted last year had died.  Now I have an empty garden bed and I haven’t decided what to do with it.  Paul was talking about making another larger raspberry / blackberry patch on one of the sloping hills and maybe I’ll just put new bushes there instead.  But my thinking was that I would keep it a permanent perennial garden and have it fenced from the scratching & snacking chickens.  I suppose we could start grapes there, but I’d honestly like to have a larger area for them.  I’ve also been thinking about planting hazelnut bushes and maybe that would be a good place for them.  Guess I’ll be thumbing through the garden magazines again.

Anyone have an idea for what type of fruit / berry / something yummy I could start here?  Something that will come up year after year.  We’re in zone 6B.  The area is approximately 4 ½’ wide x 20’ long with some late afternoon shade.  Not sure what type of soil we have (acid / alkaline) because I haven’t tested it yet (bad gardener, no parsnip).
I’d love to hear your suggestions.  Pretty please!  (Insert whiney voice here)

Friday, March 11, 2011

Easy Fish Cakes

Nothing much going on yet this morning & thankfully no kids last night, so I’ll just share an easy recipe with you.
1 can tuna, drained                 ¾ cup seasoned breadcrumbs
1 can salmon, drained            ½ tsp. garlic salt
½ cup diced onion                  3 eggs
½ cup diced celery

Flake & combine the tuna & salmon, then add remaining ingredients & mix thoroughly.  Shape into small patties & set aside.  Heat about ¼” of oil in a large pan & keep it at medium / high.  Place patties in pan & flip when bottoms are nicely browned.  Brown the other side & place on paper-towel lined plate to soak up some of the oil. 
You may only need two eggs for this recipe, but my eggs were small so I used three.  Start with two & if the mixture isn't sticking properly, just mix in the other egg.  Also, if you don't have seasoned breadcrumbs, just add some parsley, basil or oregano to flavor.  I'm not a fan of lemon with fish (I know, that's just wrong), but you could probably put a teaspoon of lemon juice in there with some dill instead of the garlic salt for a different taste.
Our Supper last night.

Thursday, March 10, 2011

The Secret Life of Chickens

Nettie is only three days from her official due date and she’s just started bagging up.  The past two years her bag was sooooo full a week before kidding that I thought it was going to explode.  Her ligaments have been here-today-gone-tomorrow the past week; they are “gone” in the mornings, but “back again” in the evenings.  She’s also still carrying her belly kind of low.  Hope everything is ok.  Guess I’m just being a worry wart.  
I’ve got the kidding pen all cleaned out and my birthing kit has been replenished and ready to go.  Paul ran the electricity out to the barn yesterday (hillbilly style via long electric cord) so I put the lights and goat (baby) monitor out there this evening.  I wasn’t going to lock Nettie in the kidding pen yet, but last night the wind was blowing & it was in the lower 30’s, so I ended up waking up a little past midnight, went out to check on her & put her in the stall.  She’s been hanging out underneath the barn & I although I don’t expect her to kid for several days, I don’t want to have to crawl under there if she does go into labor early. 
I put the monitor in the barn in the kidding pen and plugged it in this evening.  Even though I didn’t put Nettie in the pen, I’d be able to hear her if she were yelling from labor pains.  The barn houses both the goats and chickens; goats on one side, chickens on the other.  When I got in after putting the chickens away for the night I turned on the handset for the monitor. 
For some reason, I had thought that once it got dark and I shut the chicken coop door, everyone would just sit on the roosts, fluffed up with their heads tucked beneath their wings and sleep silently through the night.  Last year we had it on for two, maybe three evenings after dark and all night long we heard the low, but quite audible cluck-cluck-clucking of the chickens.  Every once in a while there’d be a buc-KAAW! But mostly just cluck-clucking.  Tonight was no different.  It’s like they’re a bunch of kids staying awake after bedtime & trying not to make too much noise so Mom & Dad don’t yell at them.  Cluck, cluck, cluck.   Flapping of feathers.  Quick, high-pitched buc-caaawww because somebody got too close to a crabby hen.  Cluck, cluck….scratch, scratch.  Cluck. 
Cluck.
Cluck.