Showing posts with label Recipes. Show all posts

Thursday, June 20, 2013

Lambs Quarters Recipes

Since I've been talking about using Lambs Quarters in my cooking, I figured I'd do some of you a favor and give you some of my "recipes" for them.  I say "recipes" as they are the kind that is a pinch of this or a little of that.  Man, did I hate that when people told me "season to taste" or "a bit of this" or "until it looks done" I was younger and now, look what I've become....one of them!

Anyways.

I use Lambs Quarter basically in any dish that you would use spinach in.  The younger leaves can be used fresh in salads, but the older and tougher (not that they are that tough) leaves are best used cooked.  And as a bonus, if you pick just the leaves off, the plant will re-grow more leaves.  I've also noticed if you snap half the plant off, it will bush out with more stalks...more leaves!   When I rip the entire plant off or just a part of the stalk, the goats get the leftovers and they love it.  They also have a longer growing season than spinach so you can be enjoying Lambs Quarters even long after your spinach has bolted!

I use them in quiche and omelets, both raw or sauteed before putting them in the egg mixture.  My favorite way is to sautee them with onions first.

I've made Creamed Lambs Quarters.

And just last night, made Lambs Quarters and Garlic pasta:
The fresh wild greens negate all the carbs in this dish.  Really.
I sauteed the onions & garlic in olive oil a bit first, then added the LQ (I'm getting sick of typing Lambs Quarters out), a bit of salt and some Parmesan cheese.

I've been meaning to make a spinach cheese ball using LQ and some fresh goat cheese, but I've yet to be invited to a party where a cheeseball would seem appropriate.  I suppose I could just make it for us, but it just seem like cheeseballs are a party kind'a thing.  And now that I think about it, I bet a LQ and goat cheese lasagna would be darned tasty; no social gathering required!

So go out there & pick yourself some Lambs Quarters!

EDITED (to add more info.)

Here's a link to a bunch of pictures of LQ.  Occasionally there will be some powdery dust on the underside of the leaves or some purple spots, neither of which will harm you if you eat it.
Also, you'll notice that when you try to wash them off, the water rolls right off the leaves making it a bit tricky to wash although it drains very nicely.

I've also noticed that they are very few insects that bother them so most of the leaves will be darn near perfect.

Size varies from only a few inches tall to over five feet tall:
One of my patches of Lambs Quarters.  The top rail of that fence is 4' tall.
Be warned though; letting them get that tall will result in back breaking
work trying to pull them out of the ground come winter.
And, as usual, PLEASE be 100% sure of what wild plants you are eating!  I am not a botanist, biologist, naturalist nor do I play one on television.  I'm just a woman who goes around my yard, trying to eat stuff that would normally be mowed over or ripped out and given to the goats.

Wednesday, March 14, 2012

Necessity is the Mother of Invention, right?

Last night Rhiannon asked for some chocolate milk.  I went into the fridge to procure the jar of milk and then into the cupboard to obtain Ovaltine. 


The container of Ovaltine was empty!  How do you reason with a toddler when Mommy just twenty seconds ago promised you a glass of chocolate milk, but now she can no longer give you any?  Those big eyes just tear a hole through you. 

So I was on a quest.  After quickly tearing apart the cupboard looking for any "hidden" stash of Ovaltine and not finding anything but hot cocoa mix (does NOT work in cold milk.....trust me), I ran to the computer to look up a homemade recipe for chocolate milk powder.  


Although there didn't seem to be any suitable powdered recipes, I did find a chocolate syrup recipe that would work great in cold milk.


1 Cup Cocoa Powder

1 1/4 Cup Sugar
1 1/4 Cup Water


Dump everything into a pot and bring to a boil for about 3 minutes, stirring to make sure it doesn't burn on the bottom.  Let cool and pour into container; I used two pint jars.  Store in fridge.


So in less than twenty minutes, we had our glasses filled with chocolate milk.  And all was right in Rhiannon's universe.

I always have cocoa and sugar on hand.  So not only am I saving money (that jar of Ovaltine costs close to $5) but it's one less product I have to buy and one less container I have to recycle or find a use for.


Technically there was nothing necessary about this, nor did I personally invent anything, but the saying still holds true.  And now I'm thinking about how good that chocolate syrup will taste on ice cream!


Saturday, February 25, 2012

Saturday Oven Lovin'

I tried making my first Pound Cake on Thursday morning.  I looked up recipes in the old standby's (Joy of Cooking and BH&G Cook Book) as well as online.  The BH&G recipe called for shortening instead of butter; I just didn't trust a pound cake recipe that used shortening instead of butter.  And I though that it was called a "Pound" cake because there was like a whole pound of every major ingredient in it, and many of the recipes did not adhere to this. 

So I did a little web searching and found this one:

3 cups cake flour
6 large eggs
1 pound butter
1 pound sugar

2 tsp. vanilla
1/2 tsp. salt
1/2 tsp. baking soda
1 tsp. baking powder
1/2 cup buttermilk

325 degree oven for an hour and ten minutes.


Pound of sugar, check.  Pound of butter, check.  Crapload of eggs, check.  Nothing else fancy or frilly or "new and improved" in order to make the good old version of a pound cake more "modern".   Sounded good to me.


The batter itself was beater-lick'n good so I was hoping for an exceptional baked version.


Never having made a pound cake before (as if I were living on Mars or something where I didn't have access to butter and eggs), I wasn't sure how the batter was supposed to look like, but figured it was going to be thicker than normal cake mix.  Which it was.


The cake itself was very dense, like a pound cake.  And oh so buttery.  And oh so good.  And oh so how many extra layers of cellulite would you like on your thighs, thank you very much.


But the consistency just wasn't right.  Although it was a dense cake, it still had a crumb-like texture.  Not
crumbly by any means, but it was definitely not what I would consider a pound cake kind'a consistency.  Unless I've been so used to eating commercially produced pound cakes that I didn't know what an actual honest to goodness real homemade cake was supposed to be like.

Did I beat the batter too much?  Too little?  Did I not have all my ingredients exactly at 70 degrees?  Did I fail to sift the dry ingredients enough?  


I guess I'll not know until I try out another recipe.  But in the meantime, we're enjoying every slice of my first-ever pound cake.


Got a recipe you'd like to share with the blogosphere?  Then go over to Tiny Gardener's blog and share your recipe (possibly for a pound cake???) with her.

Saturday, February 11, 2012

Saturday Oven Lovin'

I know there are several of you that share your recipes with us on your blog.  There are times when you guys are my "Go-To" place when I'm scratching my head trying to think of something to make for dinner, a different treat, or another bread recipe to try.  

If you want to share with a few more people, Tiny Gardener hosts a weekly Saturday Oven Lovin' where you can post a link to your recipe there.  

Here's my recipe for this Saturday:

Chocolate x 2 Cookies
1 1/4 Cups Butter, softened
2 Cups Sugar
2 Eggs
2 tsp. Vanilla
2 Cups Flour (I used 1 c. whole wheat & 1 c. white)
3/4 Cup Cocoa Powder
1 tsp. Baking Soda
1/2 tsp. Salt
1 1/2 Cups Chocolate Chips (although white chips would probably look neat)

Make like any other cookie recipe.  350 degrees for 10 minutes.  They will be a little soft, but don't be tempted to cook them much longer as they will get too crunchy after they cool off.  Not that doing so stopped me from eating the over-baked cookies dunked in milk.

Saturday, February 4, 2012

Saturday Oven Lovin

I got my oven back!  So here's my contribution to Tiny Gardener's Saturday Oven Lovin:

Homemade Soft Pretzels

http://allrecipes.com/recipe/buttery-soft-pretzels/

Yes, it's a link, sorry.  Nothing original.  But here's a picture of the goods:


The person who posted the recipe does mention that it's a sweet pretzel and I'd definiately agree.  Not that it's necessarily a bad thing, but next time I think I'd reduce the sugar to a 1/3 or even 1/4 cup of sugar.  As is though, I think it would have been good with a sprinkling of cinnamon and sugar instead of the Kosher salt.


Saturday, January 28, 2012

Saturday Oven Lovin!


Technically the recipe I’m going to share with you is neither very inventive, nor requires the use of an oven (as mine is still out of commission) but since I just made this taste-bud discovery I figured that maybe somebody else out there in the universe has also been missing out on this easy-peasy snack.

Oh, and did I mention that the recipe isn’t really a recipe per se, but a “little of this” and “a spoonful of that”?  Gawd, did I HATE those kind of recipes when I was younger!  But I guess as one gets older finds herself comfortable in the kitchen, the recipes are just like guidelines anyhow.  Right?  Right.

So here’s my recipe for the Peanut Butter Cream Cheese Honey Dip.  Creative name, hugh?

½ Cup of Peanut Butter (I used store-bought creamy style)
½  Cup of Cream Cheese
1 ½ Tbsp. Honey
2 Tbsp. Milk

Actually, I’m just making an educated guess of the amounts I actually used.  But anyhow, I glopped everything into a 4-cup Pyrex measuring cup (my favorite container of choice for whipping up small batches of stuff) and whipped it all together using an electric hand mixer until it was nice and fluffy.  

Half of it was devoured with two cut-up apples alongside our afternoon tea....

and the other half was put into a container for more tea-time dipping tomorrow.  Maybe with celery or carrots instead.

Got a recipe you'd like to share?  Head on over to Tiny Gardener's Saturday Oven Lovin' and share with the rest of us!

Saturday, January 21, 2012

Saturday Oven Lovin!

I had intended on featuring the recipe for these Cupcakes in this week's Oven Lovin:


But instead of the recipe, you're getting pictures:


Yes, the goats and chickens are eating the cupcakes.  Because they were just, well, horrible!  I got the recipe out of the older BH&G cookbook, but made two slight modifications.  I added cocoa powder and a little bit more oil to the recipe as well as adding about another 1/4 cup milk as the batter was like cement.  Not sure if that is what screwed it up, but the cupcakes were as dry as an Ozark summer and I couldn't even finish one of them.

Rhiannon, on the other hand, was pretty distraught to see her cupcakes given to the livestock and had to grab just one more before they were devoured by the critters.


Hopefully some of you have a recipe worthy of making it to Tiny Gardener's Saturday Oven Lovin!   I'm going to have to take a pass this weekend.  Unless you really want a recipe for Livestock Fodder Cupcakes.


Saturday, January 14, 2012

Saturday Oven Lovin - Or Pea Soup Facial

Winter has FINALLY come to The Ozarks.  Not that I'm partial to the wind, the freezing temperatures or having to constantly chip ice out of the water buckets, but it means that the wood stove will be cranked.

We've had some weird warm weather lately and the wood stove hasn't been chocked-full of wood yet.  It's going at night and through the morning, but during the middle of the day it becomes cool enough to touch. 

But since our daytime high temperatures were only in the low 30's mid-week I'd been keeping the stove a-blazing.  Perfect for making Pea Soup!

One of the great benefits of having a Christmas Ham.....
leftovers and bone for making Pea Soup!

8 cups water
2 cups split green peas (dry)
Ham bone (or leftover bits of ham)
Bay leaf (or two)
Onion, chopped
3 Celery stalks, chopped
2 Carrots, chopped
3 Garlic cloves, chopped
Salt & Pepper to taste
Dried hot pepper flakes (optional....not for me though)

Toss everything into a pot and simmer over medium heat until the peas get mushy & the soup looks like, well, Pea Soup.  I had my pot on top of the wood stove for six hours, lid on for the first two & then took the lid off for the remainder of the time so some of the water would evaporate & the soup would thicken a little (I like my soups more stew-like).  If you were to make your soup on top of a stove, I'm sure it wouldn't take quite as long.  I'm sure this would also work well in a crock pot.

It was very difficult to avoid passing by the pot without dipping out "just a little" soup into a cup.  And I would have just sat there with my face hovering above the pot, inhaling the heavenly aromas of pea-soup-steam had the front of my thighs not been burning from the heat coming off the stove.

Have a recipe you'd like to share with the blogosphere?  Then head over to Tiny Gardener's blog and submit yours to her "Oven Lovin" on Saturdays.

Saturday, January 7, 2012

Saturday Oven Lovin!

Here's my contribution to Tiny Gardener's Saturday Oven Lovin.

It's not going to be anything specail at all.  But it's something that I think some of you may enjoy, especially if you're a French Fry Freak.

First of all, let me confess that I LOVE McDonald's french fries.  Yes, they are bad for me, full of fat and salt and all that other stuff.  It's not like I'm in the drive-through every week, awaiting my fix and swearing at the dozen plus cars in front of me (that guy still has a Bush/Cheney bumper sticker on his SUV???), but given the chance and in a moment of weakness I'll pop in and get the 99-cent bag-o-adulturated-potatoes.  So this is definitely not a "Just as Good (bad) as McDonald's" french fries, but it's good enough.....and better for ya.

First, take your potato and wash it up.  Then slice it into french-fry sized pieces.  Space the fries evenly on a baking sheet and pop into a 425 degree oven for 12 - 15 minutes, checking to see if they are cooked to your liking starting around 12 minutes.  Sprinkle salt over them and enjoy. 

Personally, I like using the red potatoes for the oven fries best, but any 'tater will do.  Even sweet potatoes!
Sweet Potato Oven Fries
Now, you could deep fry those suckers in your FryDaddy instead of baking them in the oven.  But we'll all pretend that we're going to be healthier this year and avoid those fatty foods.  Right?  Riiiiiight.

Friday, January 6, 2012

Canned Chicken ('n Dumplings)

After figuring out that canning meats is NOT rocket science, I decided to defrost the store-bought, on-sale chicken breasts and can them:


I partially cooked the venison I canned last month so I did something different and used the raw pack method with the chicken.  I just cut the defrosted breasts into bite-sized pieces, jammed them into hot (warmed up in the oven) pint jars and poured boiling water over them.  Lids, bands, into the pressure canner for 75 minutes at 11 lbs. pressure.  Easy Peasy!

A few days ago I decided that it was time to try out my home-canned chicken.  Because not only did I want to see how it went, but I didn't have anything defrosted for dinner.

I whipped up a batch of dumplings and served them and their accompanying gravy over the warmed up chunks of home-canned chicken:

Now that I look at the picture, that big ol' dumpling & gravy
doesn't look too appetizing.....but is sure did TASTE great!

Not quite an "instant" dinner, but it did save me from having to cook any meat for the meal.

Dumplings & Gravy recipe for Chicken 'n Dumplings:

2 Cups Flour
4 tsp. Baking Powder
1 tsp. Salt

3 Tbsp. Veggie Oil
3/4 - 1 Cup Milk
1 Egg


Mix above together in large bowl until gooey (and they will be gooey!), set aside.

In a large pot, add six cups of water and five chicken bullion cubes and bring to boil, making sure cubes are completely dissolved.  Drop dumplings by the spoonfull into the boiling broth, then turn heat down to medium, cover and let cook for approximately 15 minutes.  Check around 10 minutes to make sure the dumplings haven't sucked up all the gravy and aren't sticking to the bottom. 

Serve dumplings and gravy over chicken (leftover, canned, or just-plucked & cooked).  Or just eat the dumplings & gravy......not that I've ever done that.

Friday, December 30, 2011

Homemade Breakfast Cereal

Since a possible temporary milk shortage may be on the horizon (on our farm, not nationally or globally, so don't freak out & go to CNN to check), I figured I'd better have my fill of cold cereal before we're out of fresh milk.

I guess it's no different than my homemade Granola, but it becomes cereal when I pour milk over it. 

I buy very little prepared cold cereals from the store, although Rice Krispies (or their generic counterpart) are an almost permanent part of our pantry.  There are like a million recipes that use that stuff and I love to make rice krispy treats in the summer.  And it's my fall-back breakfast for Rhiannon when she doesn't want to eat anything else.

Not only do I like to avoid those "extras" in the boxed cereal like food coloring (come on....neon blue and pink?????) and excessive sugars, but have you bought cereal lately?  Some are over five bucks a box!  For stinking cereal!!!  And the boxes are nowhere as big as they used to be.

So because I'm cheap I want healthier food, I like to make my own breakfast cereals for the house.  Well, it's not like I'm making the actual cereal itself....you know, puffing or popping or crunching up the actual grains.  I've always wanted to see how they do that; wonder if any of the companies give factory tours?  Now wouldn't that be a great future homeschooling fieldtrip for Me Rhiannon! 

When I get the hankering for homemade breakfast cereal, I buy bags of puffed wheat, puffed brown rice and crisp rice.  And all that's in those bags?  Wheat.  Rice.  Nothing else.

Puffed Wheat.  Ingredients: Whole Red Wheat.  Period.
Puffed Brown Rice.  Ingredients: Whole Brown Rice.  Period.

My recipe changes every single time.  I'm sorry to say that I've become one of "those" people who don't always follow recipes (or remember to write down what I did).  But basically, here's how I make my cereal:

Get a BIG honkin bowl.
Assemble the grains: puffed wheat, puffed rice, puffed corn, crisp rice, oatmeal.
Assemble the "special" ingredients: Cinnamon, chopped nuts, seeds, assorted dried fruits, flaked coconut, etc.

Gather the liquid ingredients / sweet stuff: Honey, maple syrup, simple homemade sugar syrup, veggie oil.

Dump all the grains in the bowl, then the dried fruits / nuts.  Mix.  Sprinkle cinnamon (or cocoa powder.....never did that before, but I might one day) & mix again.

Now this is where you're all going to yell at me.  Heat up "about that much" honey and "just a little bit" of oil in the microwave until it's warm & you can easily stir it.  Now, how much of course depends on how sweet you like your cereal and how much cereal is in that big ol' bowl.  But basically, you just want a very light coating over all the cereal.  As for how much honey (or other sweetener) to oil.....well, I'd say to about two cups of honey I'll add two Tablespoons of oil.

And you don't have to use honey.  Or just honey.  I've used a mixture of honey and maple syrup.  Or a homemade sugar syrup with a few drops of vanilla. 

Once your bowl o' cereal is mixed up nicely, spread it out into several baking pans or cookie sheets or casserole dishes and pop it into a 300 degree oven.  Or lower....or slightly higher.  Check it every fifteen minutes at first, then every five or so after "a while".  Yeah, I know, what kind of recipe is this?  Inexact measurements, guesstimated sugar to oil ratios, vague baking times.......so sue me.

But basically, you want to lightly brown the cereal.  So you'll have to just keep checking it as often as it needs to be checked so you can stir it to ensure even browning.

Take the pans out of the oven & let cool.  When cooled, break it into small pieces and store in an airtight container.  You can keep it on the countertop for a short while, but it will keep much longer in the fridge or freezer.

Saturday, December 17, 2011

Saturday Oven Lovin'

Today we have another installment of Tiny Gardener's Oven Lovin!

Go over to her blog and post your recipe(s)......here's my contribution:

Pineapple Cookies

2 Cups Flour
1 tsp. Baking Powder
1 tsp. Baking Soda
1 tsp. Salt
1/2 Cup Butter or Margarine
1 Cup Sugar

1 Egg
1/2 tsp. Vanilla
1/2 Cup Crushed Pineapple (drain juice)
1 Tbsp. Sugar

Sift first for ingredients together, put aside.  Cream butter & sugar.  Add egg, vanilla, pineapple & 1 Tbsp. Sugar.  Gradually add dry ingredients & mix until combined.  Sprinkle with chopped Pecans (if you want, unless of course, you are alergic to them, then leave them off just a few of them so the rest of us can enjoy them.....sorry Gloria!)  Bake at 375 degrees for 12 minutes.

Mrs. Mund's Fruit Cookies

1 1/2 Cup Sugar
1/2 Cup Butter
2 Eggs
2 2/3 Cup Flour
1/2 tsp. EACH Cinnamon, Nutmeg, Cloves (powdered, not whole)
1 tsp. Soda
1 Cup Pecans or Walnuts (or Almonds...you know, if you're alergic to Pecans and Walnuts....Gloria!!)
1 Cup Dates, chopped
1 Cup (or the whole 8 oz. tub if you REALLY like those thingies) Candied Fruit & Peel
2 Tbsp. Wine

Combine flour, spices, soda.  Cream sugar & butter, then add eggs, & wine.  Gradually add flour mixture until combined.  Add nuts, dates and fruit thingies and mix.  Bake at 350 degrees for 12 - 15 minutes.


The Pineapple Cookies are from my Mom's recipe collection and the Mrs. Mund's Fruit Cookies came from Gloria's recipe book.  I am not a fan of fruit cake, but I DID enjoy (more than a few) the Fruit Cookies.  So if you're an avid Fruitcake-hater, try the cookies......they were yummy!

Wednesday, December 14, 2011

Chicken and Noodles

Julie over at Mooberry Farm posted a recipe for Chicken and Noodles using leftover chicken.  She's a woman after my own heart.....nothing goes to waste!

And that recipe had perfect timing as we also had roast chicken on Monday night so I had leftover chicken to use up on Tuesday.  Now that's "Leftover Chicken Blogging Recipes Serendipity" if I do say so myself!  (Hugh? Nevermind.)

So I grabbed my laptop with Julie's post on-screen & put it on the kitchen counter so I could start making supper.  Chicken, check!  Potatoes, check!  Carrots, check!  Celery, check!  Chicken bouillon cubes, check!  Egg noodles, uhm, not so much.

But wait!  She also included a link to her great-grandmother's recipe for homemade egg noodles! 

I LOVE egg noodles.  But I'm an egg noodle snob.  I don't care for the dried ones; I like the frozen noodles, which of course, are more expensive therefore I do not buy them often.  Actually, I think the only time I ever buy them is for Thanksgiving or Christmas (which we then smother in turkey gravy).

So this was going to be the day I made egg noodles for the first time.  And I can say two things about the actual process; they are darned sticky and I really, really want a pastry cloth!

I kneaded my dough on the countertop sprinkled with copious amounts of flour, but my fingers kept getting stuck together.  So I pulled what eggnoodlegoo I could off of them, washed my hands, then sprayed my hands with cooking spray.  Much nicer. 

And since I am horrible at rolling out dough from any recipe, I lightly sprayed my baking sheet & rolling pin with cooking spray & rolled the dough out on the pans instead of doing it on a floured countertop.  Cheating?  Possibly.  But it got the job done.  Sort of.


I had another hour until I had to start supper so I left the noodles on the baking sheet.  And the noodles dried a little bit on top, but not on the bottom so they kind'a stuck to the sheet.  So I basically had to coax each and every stinking egg noodle off the sheet, cussing after each pull.

So was it worth it?  Definitely!  I can now add "Egg Noodles" to the list of things that I will no longer buy from the store!

And here's the result of the Eggnoodlerama and accompanying recipe items:
As if there wern't enough carbs in the bowl, I added a slice of homemade bread.
Thanks for the inspiration Julie!

Recipe Notes: Technically, I did make two modifications from Julie's recipe. I didn't add the celery because it looked a bit past the "people-eating" stage, so it went into the chicken bucket, and I did add about a cup of leftover chicken gravy from last night's supper so I omitted the butter.  I also used Russet potatoes, which didn't hold up as well as a yellow or red potato would have, but I didn't have any.

Saturday, December 10, 2011

Saturday Oven Lovin!

Every Saturday, Tiny Gardener hosts Saturday Oven Lovin over at her blog.
Here's my recipe for this week:


Oatmeal Raisin Cookies

1 Cup Vegetable Oil
1 Cup Brown Sugar (or 1 Cup Sugar & 1 tsp. Molassas)
2 Eggs
1 tsp. Vanilla
1 Cup Flour
1/2 tsp. EACH Baking Soda and Salt
1/2 tsp. Cinnamon
1/4 tsp. Nutmeg
4 Cups Oatmeal
1 Cup Raisins
Make as you would a normal cookie recipe.  Bake at 350 degrees for 10-13 minutes.

This is probably my favorite Oatmeal Raisin cookie recipe.  It's also a handy recipe to have around as it uses oil instead of butter.  And if you wanted to make this recipe with all shelf-stable items, you could just replace the eggs with egg powder (mixed with water to make the equivalent of two eggs).

Speking of shelf-stable cookery, Yukon Mike over at Living Prepared does quite a few recipes using only shelf-stable items.  Click on any of the "Food" items on the Topics sidebar to see them.

Saturday, December 3, 2011

Saturday Oven Lovin

Tiny Gardener had a most excellent idea for a Saturday blog post: Oven Lovin!

Not only does this give the participating bloggers a reprieve from having to make stuff up write a somewhat intelligent or informative post on Saturday, but it gives us a chance to swap recipes!

I didn't have to put a lot of thought into what I was going to submit for my recipe as I had these on the countertop staring at me for the last few days:

So for my first Oven Lovin recipe, I present to you my Banana Oatmeal Bread:
1 ¼ Cup Whole Wheat Flour
1 Cup Oatmeal
1 tsp. Baking Soda
½ tsp. EACH Cinnamon & Salt
1 Cup Sugar
2 Eggs
½ Cup Vegetable Oil
1 tsp. Vanilla
2 Ripe Bananas
¾ Cup Sunflower Seeds


Combine the flour, oatmeal, soda, salt & cinnamon together in a bowl & set aside.  Cream together the sugar, eggs, oil & vanilla then add the bananas & mix until kind’a smooth.  Gradually add the flour / oatmeal and then add the sunflower seeds.  Pour batter into a greased & lightly floured pan and bake in a 375 degree oven for 60 minutes or more (check using a toothpick after an hour).
This was a make-shift recipe when I had a LOT of oatmeal in the house and NOT a lot of walnuts around.  So I figured I may as use the oatmeal in place of some of the flour and use what nuts I DID have around; sunflower seeds.  Seeds, nuts, whatever.  Ever since I used the sunflower seeds in the banana bread, I haven’t gone back to the walnuts. 
Enjoy!

Thursday, November 10, 2011

Soup's On!

What does one do with a freezer full of year-old chicken neck bones, feet and backbones?  Well, if you’re 85% of the “normal” population, you probably don’t even have those things in your freezer, because you would have:
A) tossed those pieces out when you finished your Walmart pre-cooked chicken
B) never got those pieces in your package of “fresh” Smart Chicken or Perdue from the supermarket
C) the Tai Noodles with Chicken take-out only came with chunks of chicken breasts.
But, the rest of us will make it into Chicken Stock!  And if you’ve never made chicken stock, it’s about time you did.  It’s easy and oh-so-yummy.  Forget what you’ve tasted out of the can. Homemade is like chicken soup orgasm!  Like you’ve taken a chicken and just sucked the chicken-ness out of it and put it in a bowl for you to slurp up on a cold, damp afternoon.  Almost makes you wonder exactly what they do to the stuff in the cans at the store to make it taste like it does.
So, how does one go about making Chicken Stock?  Well, you can go about it in a number of ways.  First, one must acquire a chicken, or suitable parts of a chicken.
A)   Go outside, pick a particurally nasty rooster, lop the head off, pluck, eviscerate & clean it.
B)   Dig through the deep freezer and find the not-quite-freezer-burned bag of chicken parts you bagged up last year for soup.
C)  Go to the supermarket and buy a whole chicken or pieces of chicken (cheapest parts are fine; if legs are on sale, go with the legs….if wings are on sale, go for the legs).
Next, go through your fridge.  Got some of those not-quite-ready-for-tossing veggies sitting in the back?  Take those carrots, onions, celery, wash the funk or hairy things off them, chunk ‘em up and put them aside.  Got some green onions or a clove of garlic?  Great.  Now go find a few bay leaves, salt and pepper.
Toss the chicken parts, veggies and bay leaves in a big pot, about two teaspoons of salt, several dashes of pepper and add water just to cover everything.  Turn on the burner, bring it to a boil then turn it down to a slow boil or simmer, just depends on how long you want to keep watching the pot.  When the chicken comes off the bone easily (like when you pick up a drumstick, the meat just sloughs off), strain the soup through a sieve into another pot and then pick the meat out of the strainer and put it in a container in the fridge for later use.  Save the veggies for the chickens or compost heap (you weren't going to throw that in the garbage, were you????)
I know this isn’t an exact recipe, and I know it drives some people crazy when there aren’t exact directions (for example, ME!), but honestly, I don’t follow any recipes for soup stock anymore.  I’m sorry. 
But, here is what looks like a good recipe for Chicken Stock, and it basically sounds like what I did, had I taken the time to actually measure out my ingredients.
Actually, I did do something else differently.  I used a pressure canner to cook my chicken stock.  It’s faster and I feel it gets more of the chicken-goodness out of the bones if it gets pressure cooked.  Same ingredients, just tossed into the pressure cooker and cooked at 10 lbs. for about twenty minutes (or more).  Technically it’s longer than what is recommended in the recipe book, but I like to do some other things with the “leftovers” from the soup. 
So now you’ve got your chicken stock.  Taste it and add salt & pepper if needed.  You can then slurp it all up or put it in the fridge for a few days or right into the freezer.  If you’re planning on canning the stock, then you’ve got a little more work to do.
I put the cooled stock into containers in the fridge.  The next day I’ll skim the fat off the top (oh, the shame!!) and re-heat the stock until boiling.  I’ll have cleaned quart jars, lids and bands ready and the pressure canner ready.  When the stock is at the boiling point, I pour it through my milk strainer fitted with a filter, put the lid and band on and into the canner it goes.
Straining the hot stock into clean hot quart jars, ready to go into the canner.
The chicken stock needs to be pressure canned at eleven pounds of pressure for twenty-five minutes (longer for high altitudes, check your canner instruction booklet for more info.).  After the time is up, turn the heat off or carefully move the canner over to a cool spot on the stove and let the pressure drop on its own.  When the pressure has dropped to zero, open the canner and place your homemade chicken stock on the counter for the night, making sure that each lid has “pinged” and sealed.
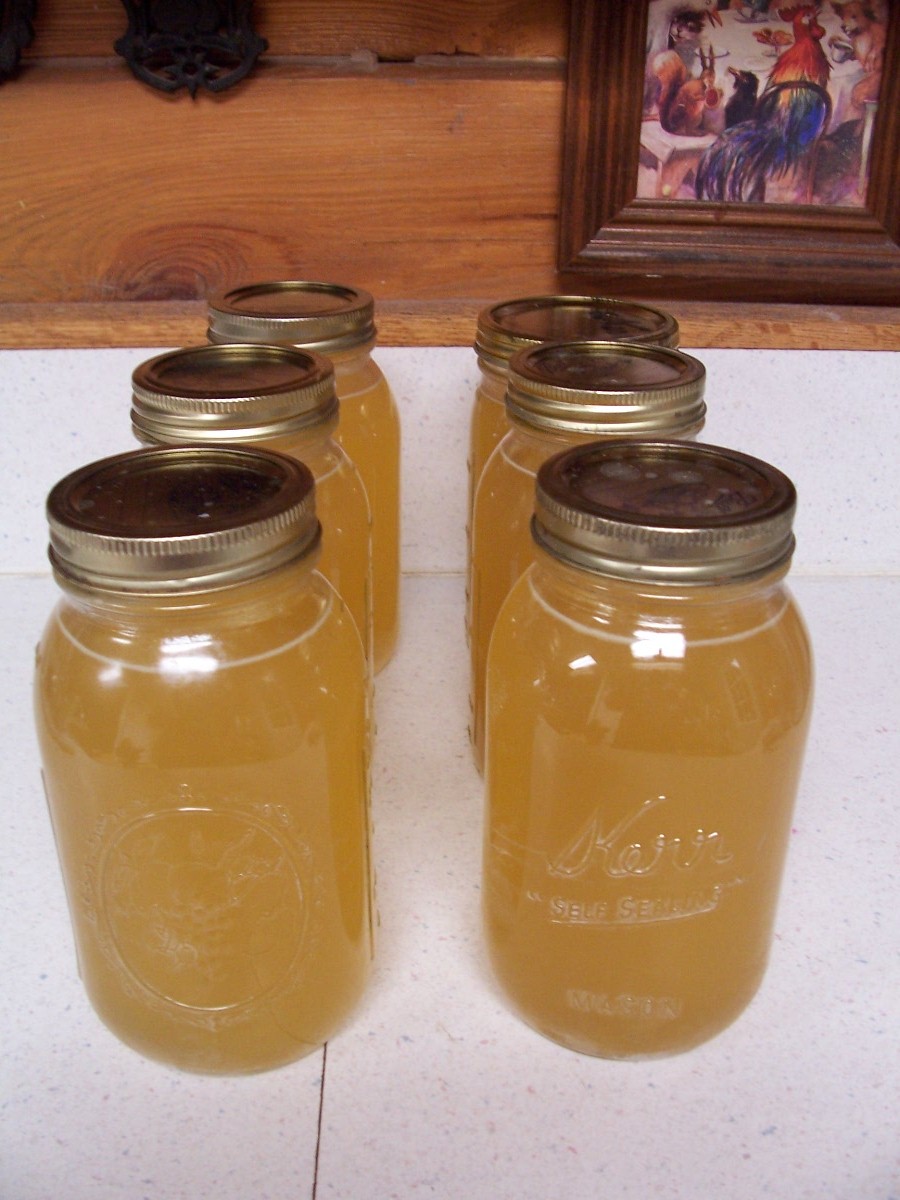
"Pinged" and sealed jars of homemade chicken stock.
You now have stock ready to be used whenever you get the hankering for chicken soup or for making other homemade dinners.  Remember that chicken you picked off the bones?  Plop it in a pot with the stock, some fresh chopped veggies and some egg noodles or rice or barley.
  
I’m exhausted from writing this post.  Better get myself a second bowl of soup so I don’t waste away to nothing (as if).

Thursday, October 20, 2011

Green Tomato Chutney

I'd like to thank all of you that made suggestions on what I should do with my green tomatoes.  And you know what I did?  Something not suggested, of course.  Not that I wouldn't make the suggested recipes, but I stumbled upon something that I just had to make myself try.  Chutney.

I had no idea what chutney is.  I've occasionally spied it on the tables at the local farmer's market, but steered away from it because, well, because it's called "Chutney".  What kind of name is that anyways??

I did some online searching for "green tomato recipes" and came upon several chutney recipes.  So curiosity finally got the best of me and I read a few of them.  Some had ingredients like jalapeno peppers, others had apples or apricots.  Not being one that likes spicy stuff (to Paul's utter dismay), I wanted something sweeter.  And as usual, I didn't follow just one recipe.  I have a habit of taking several recipes and tailoring them to my liking.  So here is my Green Tomato and Apple Chutney:


2 1/2 lbs. green tomatoes, chopped
8 oz onions, chopped
8 oz. raisins
1 lb. apples, peeled, cored & chopped
1 1/2 cups sugar
1/4 cup molassas
2 cups apple cider vinegar
1 tsp. ground ginger
1 tsp. ground cloves
2 tsp. ground cinnamon

Dump all ingredients into a large pot & simmer on medium heat for about two hours, or until thickened.

Wasn't that simple?!  And as a bonus, the house smells wonderful - just like Fall!  Several of the recipes mentioned that the taste gets better if you allow the chutney to sit for a few weeks.  I, of course, couldn't wait.  It.  Was. Great! 
What have I been missing?!?!  It would be great on little crackers, or on top of porkchops or a pork roast.  And honestly, I can even see a somewhat-spicy chutney recipe in the future.

The above recipe made three pint jars and three jelly jars (not sure how much is in a jelly jar, hmmmmm).  Wonder if any of them will make it as gifts this year.

If you were going to eat this right away or keep it in the fridge, you wouldn't have to water-bath can the chutney, but since I was hoping to give a few away as Christmas gifts, I figured I should be safe and do so (ten minutes).  Nothing like accidentally giving your friends botulism for the holiday.

Sunday, October 16, 2011

Found it! Cinnamon Rolls

Found the recipe for the Cinnamon Rolls I made last weekend:

Copy Cat Cinnabon Recipe

I did make some slight modifications, however (imagine that).  I used half whole wheat and half white flour and I only inverted the pan of rolls for a minute or two (so the sugar / butter on the bottom soaks through the rest of the rolls).

Other than that, everything was done as instructed.  Although I will say it took much, much longer than the listed prep & cook time.  Guess I'm just slow.

My recipe made a pan of twelve and a smaller pan of six.  Personally, I think I would have liked to have had fewer rolls in the pan to allow for more expansion (fluffier rolls), but they still turned out great.

We took a package of two rolls out of the freezer this morning & warmed them up in the microwave.  Still tasted great even after being frozen.  Going to make this recipe again when we run out.